为了简化spring应用的搭建和开发,遂诞生了Spring boot这个全新的框架。Spring boot简化了大量的XML配置和复杂的依赖管理,采用习惯大于约定,可以模块化方式导入依赖,提供了RESTful Web服务,为微服务提供了支持。Spring boot快速构建将成为一股风。
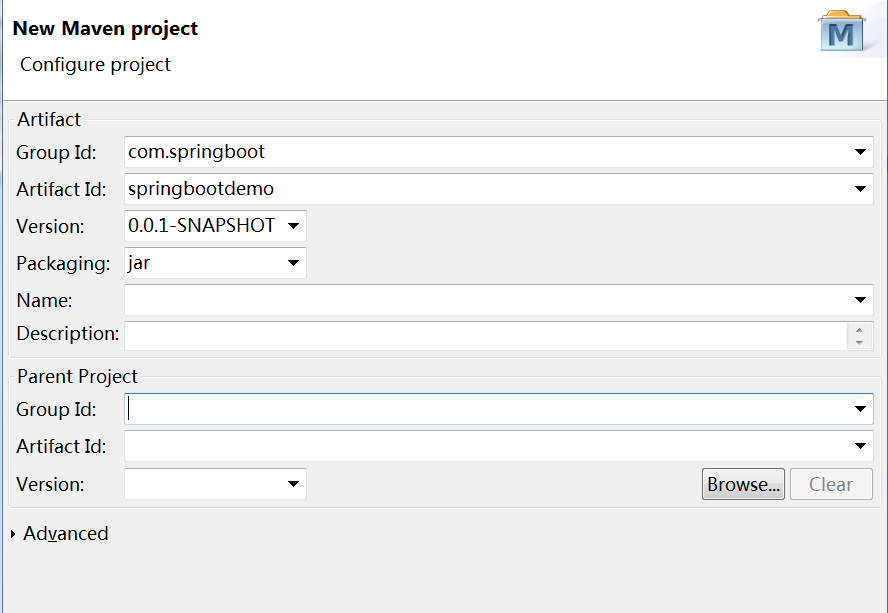
创建Maven工程
根据向导创建maven工程
添加依赖
依赖和继承父工程,往pom.xml里添加依赖
- <parent>
- <groupId>org.springframework.boot</groupId>
- <artifactId>spring-boot-starter-parent</artifactId>
- <version>1.5.4.RELEASE</version>
- </parent>
当然可以用依赖的关系来替换:
- <dependencyManagement>
- <dependencies>
- <dependency>
- <!– Import dependency management from Spring Boot –>
- <groupId>org.springframework.boot</groupId>
- <artifactId>spring-boot-dependencies</artifactId>
- <version>1.3.1.RELEASE</version>
- <type>pom</type>
- <scope>import</scope>
- </dependency>
- </dependencies>
- </dependencyManagement>
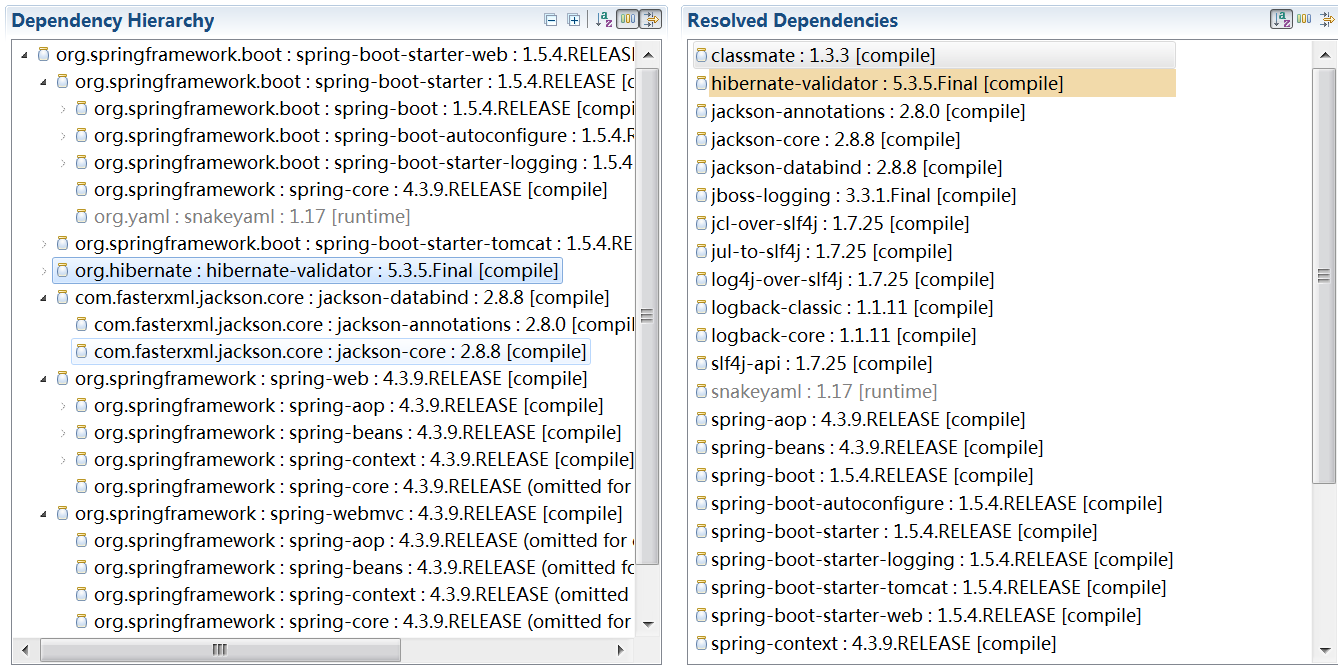
继续添加整合web依赖包的依赖:
- <dependency>
- <groupId>org.springframework.boot</groupId>
- <artifactId>spring-boot-starter-web</artifactId>
- </dependency>
maven 构建后,查看依赖层次关系
代码
创建HelloWorldApp类,提供项目入口main函数和加入类注解@SpringBootApplication
- public static void main(String[] args) {
- SpringApplication.run(HelloWorldApp.class, args);
- }
再加入restful 风格的控制层注解@RestController,试下
- @SpringBootApplication
- @RestController
- @RequestMapping(“/hello”)
- public class HelloWorldApp {
- @RequestMapping(“/{id}”)
- public Map<String,Object> view(@PathVariable(“id”) String id) {
- Map<String, Object> hashMap = new HashMap<String,Object>();
- hashMap.put(“id”, “hello “ + id);
- return hashMap;
- }
- public static void main(String[] args) {
- SpringApplication.run(HelloWorldApp.class, args);
- }
- }
确实可以看出还是springMVC的风格,只是spring boot 进行了整合。Main方法作为web项目的入口,说明spring boot 有把web项目打包成jar包的能力,添加maven插件:
- <!– Package as an executable JAR –>
- <build>
- <plugins>
- <plugin>
- <groupId>org.springframework.boot</groupId>
- <artifactId>spring-boot-maven-plugin</artifactId>
- </plugin>
- </plugins>
- </build>
项目启动
启动项目:
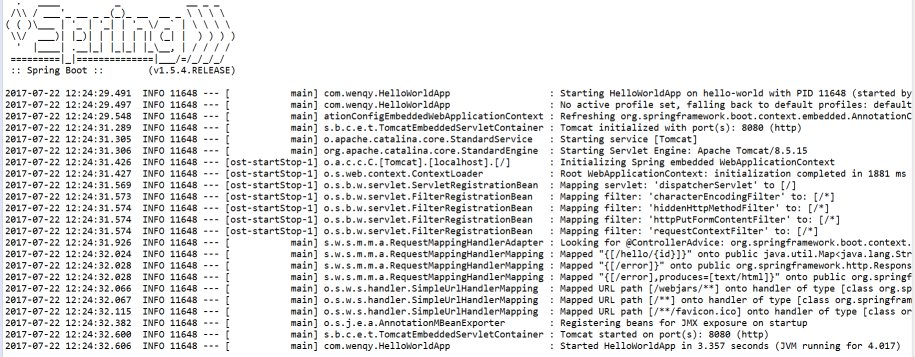
项目启动成功,默认是8080端口,访问URL:localhost:8080/hello/wenqy

controller中的路由映射方法返回值可以是返回对象,List,Map等等,springMVC会自动解析成json字符串。
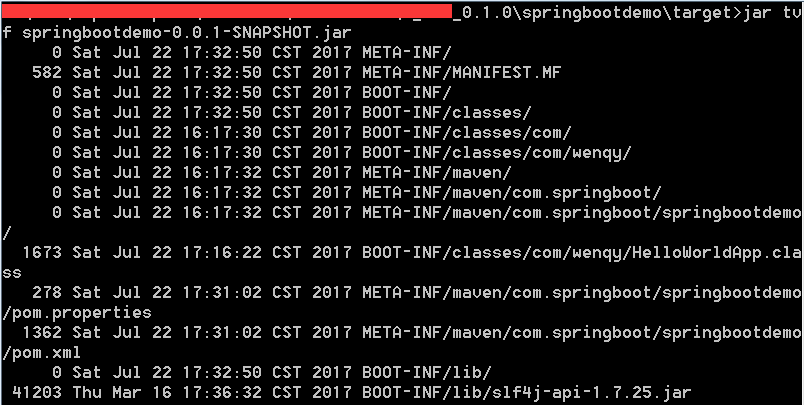
利用 mvn package 命令 打包成jar,在target目录下可以找到生产的jar包
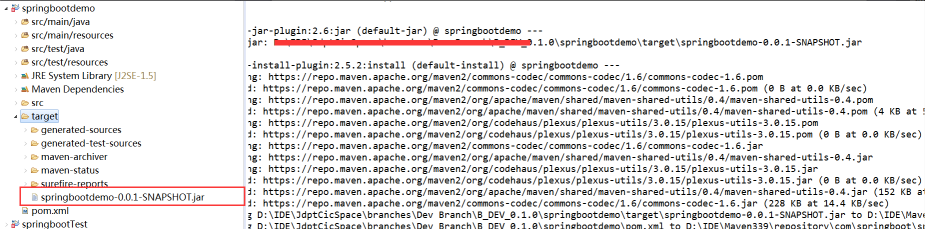
用 jar tvf springbootdemo-0.0.1-SNAPSHOT.jar 查看里面的内容
然后,启动项目 java -jar target/springbootdemo-0.0.1-SNAPSHOT.jar
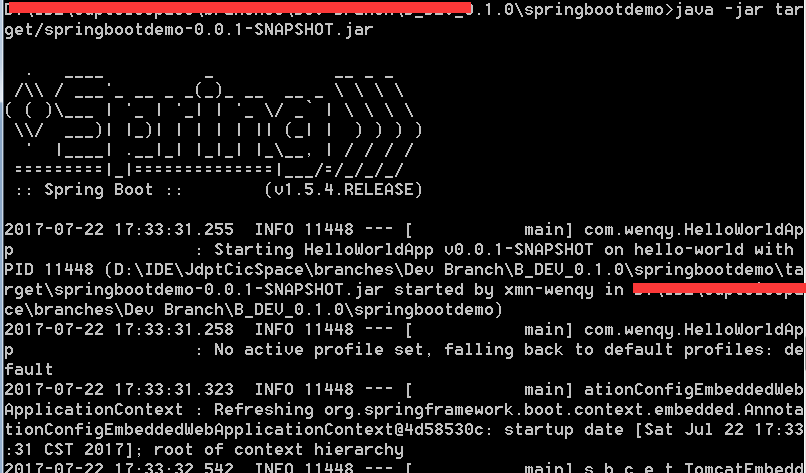
启动成功后,继续访问刚才的路径,得到的结果是一样的。
加入测试模块的依赖,包括JUnit、TestNG、Mockito
- <dependency>
- <groupId>org.springframework.boot</groupId>
- <artifactId>spring-boot-starter-test</artifactId>
- <scope>test</scope>
- </dependency>
Junit测试
编写junit单元测试
- @RunWith(SpringJUnit4ClassRunner.class)
- @SpringBootTest
- public class HelloWorldAppTest {
- @Autowired
- private WebApplicationContext wac;
- private MockMvc mockMvc;
- @Before
- public void setup() {
- this.mockMvc = MockMvcBuilders.webAppContextSetup(this.wac).build();
- }
- @Test
- public void getHelloWorld() throws Exception {
- this.mockMvc.perform(MockMvcRequestBuilders.get(“/hello/wenqy”)
- .accept(MediaType.parseMediaType(“application/json;charset=UTF-8”)))
- .andDo(MockMvcResultHandlers.print())
- .andExpect(MockMvcResultMatchers.status().isOk())
- //.andExpect(MockMvcResultMatchers.content().contentType(“application/json”))
- .andExpect(MockMvcResultMatchers.status().isOk())
- .andExpect(MockMvcResultMatchers.jsonPath(“id”).value(“hello wenqy”));
- }
- }
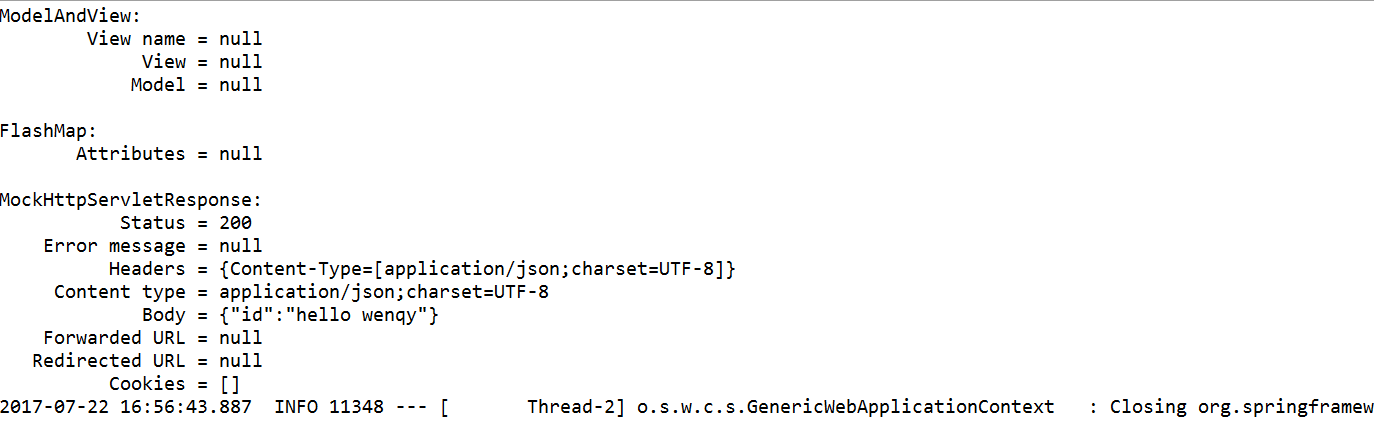
测试打印情况:
如果想自己利用现有代码快速搭建,可以到https://start.spring.io/ 下载demo,还支持gradle的项目。
参考:
http://docs.spring.io/spring/docs/current/spring-framework-reference/htmlsingle/#Server-Side Tests
http://docs.spring.io/spring-boot/docs/current/reference/htmlsingle/#getting-started-first-application-code


发表评论